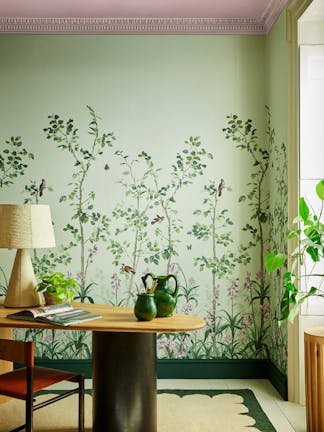
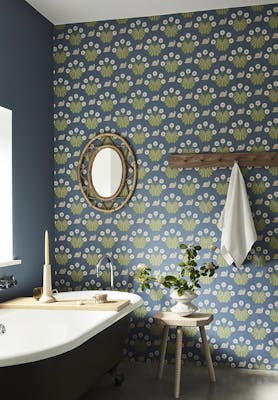
Incorporating wallpaper allows you to embrace interesting colours, patterns and textures that can completely transform your scheme. While it might seem difficult, with the right tools and method, decorating with wallpaper can be simple to achieve.
Read our expert guide for your next wallpaper project…
Tools you will need:

- Your chosen Little Greene wallpaper. If you have not yet chosen your wallpaper, find inspiration below.
- Little Greene Ready Mixed Wallpaper Paste
- 2 x large brushes – one for pasting and one for hanging
- Filler
- Sponge
- Sugar soap
- Wallpaper cutting table
- Wallpaper cutting scissors or sharp Stanley knife
- Electric steamer (if needed)
- Stripping knife (if needed)
Preparing your surface
As with all decorating projects, preparation is key. For your wallpaper transformation to succeed, it’s important not to cut corners on any of these steps.

For painted or papered walls
If there’s already wallpaper on your walls, it must be properly removed first. While it is possible to wallpaper over an existing layer, the finish will never be as smooth.
- Use an electric steamer and stripping knife to remove all existing wallcoverings and linings from the walls you are papering.
- Hold the steamer onto the wall for 10 seconds at a time, from the bottom to the top, pulling and scraping wallpaper off as you go.
- Once the paper has been removed, or if your walls are painted, clean the wall surface with sugar soap and wait until dry and smooth.
- Fill in any wall cracks or imperfections with filler, leave to dry and sand down.
- If this is an old property or there is any sign of mould, this must be treated with a proprietary mould cure wash before going any further.

For fresh plaster walls
If the walls are new plaster or another absorbent surface, this must be pre-treated with a fungicidally protected adhesive, or ‘sized’.
Once your plaster has fully dried, water down your wallpaper paste or adhesive with 10-15% addition water. Apply one coat to your walls with a large brush.
DIY tip: Sizing your walls creates a protective base upon which you can apply your wallpaper paste with confidence, meaning the wallpaper is less likely to peel.
For gloss, stained or imperfect walls
Any gloss surfaces must be sanded down first to create a rough surface for applying wallpaper paste.
If you choose to apply lining paper first, this should be hung horizontally. Hanging lining paper is advisable for walls which have imperfections, to ensure you achieve a smooth finish when you decorate with wallpaper
Hanging the wallpaper
Once the preparation stage is finished, it’s onto the main event! This comes in three stages: measuring, pasting, hanging.
For best results, we recommend using Little Greene Ready Mixed Wallpaper Paste alongside all of our wallpapers.
N.B. The instructions below refer to ‘paste the paper’ wallpapers. For non-woven, ‘paste the wall’ wallpapers, follow the instructions on the label.
Measuring

- Carefully measure 50cm (20 inches) out from one corner on a wall next to a ‘window wall’. Use a plumb line to draw a vertical line from the ceiling to the floor. Repeat this process for every wall that you are papering.
DIY tip: As many walls are not perfectly straight, drawing the vertical line will avoid the wallpaper being hung slightly askew.
- Measure the height of the wall in different places. Take the largest measurement and add a few centimetres to allow for pattern match and trimming.
- On your wallpaper cutting table, place your wallpaper pattern side down and measure to the required length. Rule and cut the rolls of wallcovering so you have a straight line at the top.
- Continue cutting wallpaper until you have all your required lengths. When cutting, you might find it helpful to place each length edge to edge with the previous length to ensure the patterns line up.
Pasting

- With a brush, apply your wallpaper paste evenly in a herringbone pattern, ensuring all edges are fully covered to prevent any peeling. Take care not to ‘over brush’ and accidentally catch the surface of the wallpaper.
- Once the section in front of you has been pasted, fold the paper over, keeping the pasted side against itself. Carefully move the paper along the table until the whole length has been pasted with an even coating.
- Leave to soak for 5 minutes (or following the manufacturer’s instructions).
Hanging

- Carefully and slowly, slide the pasted wallpaper into position on the wall. The right-hand edge of the wallpaper should align with the vertical line you drew earlier. The other edge of the paper should overlap around the corner of the wall, by 20mm. Make sure to leave excess at the top and bottom for trimming.
- With a clean brush, smooth away any air bubbles, starting from the centre and squeezing out to the edge. Take care to ensure that you do not transfer paste from the wall onto the surface of the paper.

3. Now crease and trim the wallpaper at the top and bottom, so it fits neatly onto the wall. Repeat this same process with the other lengths, butting edges together and matching the pattern.
DIY tip: It’s vital to take your time with this step. Whether it’s an intricate pattern or a bold geometric print, being careful with the pattern matching will make or break the end result.
4. In most cases, you will need to trim the final length vertically. Simply crease and trim in the same way you have been cutting the top and bottom of the paper.
5. Now with perfectly papered walls, the only thing left to do is clean up! All equipment should be cleaned with clean water and a mild detergent immediately after use.
Expert tips

- Don’t worry if there’s areas where slight overlapping is unavoidable. Simply use a vinyl overlap adhesive to assist in these tricky places.
- Make sure you wipe away any surplus paste immediately. Any transfer of paste from the wall onto the surface of the paper could damage the finish. If this occurs, sponge away gently with clean water.
- Ensure you hang each length of wallpaper in the correct direction. At the pasting stage, you might find it helpful to mark the back of the wallpaper with a ‘T’ at the top to avoid any mishaps!
Choosing your wallpaper
At Little Greene, our eclectic range of wallpapers offers something for every home and setting. From bold botanical patterns and delicate florals to classic prints, find striking designs to suit your style within our collections. Browse our wallpapers by colour, style or period to find the perfect design for your project.
Whether you prefer timeless design or contemporary interpretations, our range of historic wallpapers have been designed for use in the modern interior. The wallpapers in our National Trust Papers collections were found in historic properties in the care of the National Trust. Each design has been carefully reworked and recoloured into a range of beautiful colourways, from elegant, muted designs to more vibrant versions.
Each Little Greene wallpaper pairs perfectly with our paint colours, so you can create cohesive, beautiful interior designs with ease. Order wallpaper samples and test in situ alongside paint sample pots to find your chosen combination.
Poppy Trail - Masquerade Bathroom

Burges Snail – Juniper Bathroom

Hencroft - Blue Primula Hallway


